How to Make Turkey Gravy: Easy Steps for Perfect Flavor
Every Thanksgiving, my grandmother’s kitchen was filled with the rich aroma of her famous turkey gravy. It wasn’t just the recipe that made it special. It was the love she put into every spoonful. Making turkey gravy is more than just a sauce. It’s about creating a tradition that brings families together.
Creating a homemade turkey gravy recipe might seem hard, but it’s not. With the right techniques, you can turn simple ingredients into a luxurious sauce. Whether you’re new to cooking or experienced, making turkey gravy is easier than you think.
This guide will teach you everything about making the perfect turkey gravy. You’ll learn about understanding drippings and achieving a smooth, flavorful sauce. Your guests will be asking for seconds.
Table of Contents
Understanding Turkey Gravy Basics
Making the perfect homemade brown gravy is an art. It turns your turkey dinner into something special. The key is knowing the basics that make simple drippings into a rich sauce.
When making gravy, focus on three main things: quality drippings, the right thickening agents, and the right seasonings. The turkey roast pan is where all the flavor starts. It’s the base for your gravy.
What Makes a Perfect Turkey Gravy
A great gravy has a few key traits:
- Smooth, lump-free texture
- Deep, rich turkey flavor
- Just the right thickness
- Seasoning that’s just right
Essential Ingredients Overview
To make gravy from drippings, you need these basic ingredients:
| Ingredient | Quantity | Purpose |
|---|---|---|
| Turkey Drippings | 1½ cups | Primary flavor base |
| Butter | ¼ cup | Fat for roux |
| Flour | ¼ cup | Thickening agent |
| Chicken Broth | 1 cup | Additional liquid |
The Role of Drippings in Gravy Making
Drippings are the liquid gold of turkey gravy. They hold the most intense flavors from your roasted turkey. This makes the gravy unforgettable.
“Great gravy starts with great drippings” – Culinary Wisdom
By grasping these basics, you’ll make a gravy that’s the star of your holiday meal.
How to Make Turkey Gravy
Making turkey gravy without turkey drippings is simpler than you might think. It’s perfect for holiday meals or just a tasty sauce. There are many ways to make the ideal gravy.
Without drippings, you can still make a delicious gravy. The trick is to know how to make a smooth roux and use rich stock.
“Great gravy is all about technique and balance of flavors” – Professional Chef
- Gather your ingredients for gravy without drippings
- Select a high-quality chicken or vegetable stock
- Prepare your roux with equal parts fat and flour
- Whisk continuously to prevent lumps
To make no drippings gravy, melt 4 tablespoons of unsalted butter in a saucepan. Then, whisk in 5 tablespoons of all-purpose flour. Cook for 1-2 minutes until it’s golden brown. Slowly add 6 cups of warm chicken, whisking constantly for a smooth mix.
| Ingredient | Quantity | Purpose |
|---|---|---|
| Unsalted Butter | 4 tablespoons | Base for roux |
| All-Purpose Flour | 5 tablespoons | Thickening agent |
| Chicken Broth | 6 cups | Liquid base |
Season your gravy with salt, pepper, and herbs to taste. Pro tip: The gravy will thicken as it cools, so aim for a slightly thinner consistency while cooking. You can store homemade gravy in an airtight container in the refrigerator for up to 4 days or freeze for up to 3 months.
Equipment and Tools Needed for Gravy Making
Making the perfect turkey gravy is more than just using great ingredients. The right tools are key to success. Whether it’s for a holiday feast or a family dinner, the right equipment makes all the difference.
Essential Cookware for Gravy Preparation
Choosing the right cookware is the first step to making great gravy. A large roasting pan is essential for catching all the juices. Look for pans with sturdy handles and enough depth to hold all the juices.
- Heavy-bottomed saucepan
- Large roasting pan for turkey
- Fat separator
- Non-stick skillet
Precision Measuring Tools
When making gravy, accuracy is crucial. Tools for spatchcocking a turkey are useful, but for gravy, you need:
- Liquid measuring cups
- Dry measuring cups
- Measuring spoons
- Kitchen scale
Straining and Finishing Equipment
For a silky-smooth gravy, invest in good straining tools. A fine-mesh strainer removes unwanted bits, making your gravy look professional.
“The right tools transform good cooking into great cuisine.”
With these tools, you’ll be ready to make a gravy that will wow your guests and make your holiday meal unforgettable.
Understanding Turkey Drippings and Stock
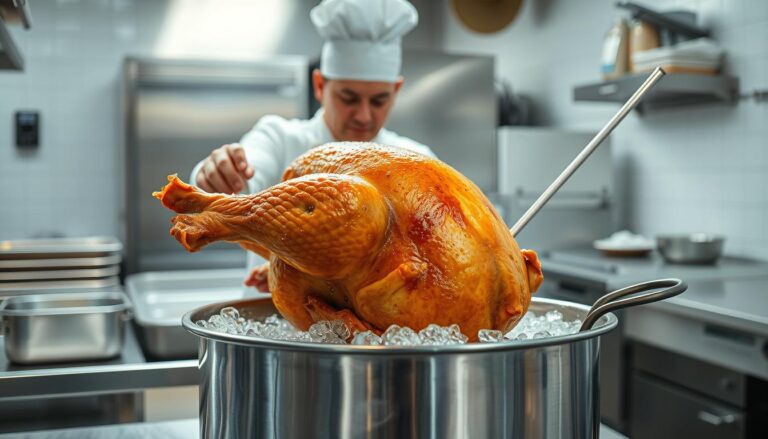
Turkey drippings are like liquid gold for making rich, flavorful gravy. When you roast a turkey, the pan catches delicious juices. These juices are the base of an amazing sauce. Knowing how to use these drippings can make your gravy truly special.

- Collect drippings right after roasting
- Use a fat separator to separate fat from liquid
- Skim off excess grease to avoid oily gravy
- Save 1 cup of turkey drippings
When making turkey necks and gravy, remember these important measurements:
| Ingredient | Quantity |
|---|---|
| Turkey Drippings | 1 cup |
| Stock | 1 1/2 cups |
| Total Liquid | 2 1/2 cups |
Pro tip: Turkey neck stock can add incredible depth to your gravy. Simmer the neck in water with aromatics to extract maximum flavor before incorporating into your recipe.
“The secret to great gravy lies in the quality of your drippings and stock.” – Professional Chef
Your goal is to make a smooth, flavorful gravy that goes well with the turkey. By understanding how to handle drippings and stock, you’ll make your holiday meal unforgettable.
Creating the Perfect Roux for Gravy
Learning to make brown gravy from scratch begins with mastering the roux. This basic skill is essential for anyone aiming to thicken and enhance their gravy’s flavor.
A roux is the key to rich, smooth gravy. It’s a mix of equal parts fat and flour that turns simple pan drippings into a decadent sauce.
Proper Flour-to-Fat Ratio
The secret to a great roux is the right mix of ingredients. Here’s the expert ratio to follow:
- 4 ounces butter
- 4 ounces all-purpose flour
- 1:1 fat-to-flour proportion
Cooking Time and Temperature
Getting the roux just right needs attention to detail:
| Roux Characteristic | Specification |
|---|---|
| Preparation Time | 15 minutes |
| Ideal Color | Darker than peanut butter |
| Stirring Frequency | Constantly |
| Cooking Temperature | Medium-low heat |
Common Roux Mistakes to Avoid
Watch out for these common roux mistakes:
- Burning the mixture by not stirring constantly
- Using high heat
- Adding liquid too quickly
- Not cooking the flour long enough
“A perfect roux is the foundation of an incredible gravy” – Professional Chef
By sticking to these tips, you’ll make a roux that will take your turkey gravy to the next level.
Adding Flavor Enhancers and Seasonings

To make a basic white gravy recipe stand out, you need to add flavor. When you make white gravy from scratch, try different seasonings. These can make the taste go beyond just salt and pepper.
Here are some ways to make your white gravy recipe easy and flavorful:
- Classic herb combinations like sage and thyme
- Umami-rich ingredients such as Worcestershire sauce
- Garlic powder for depth
- Black pepper for subtle heat
Try out these seasonings to make a white gravy that’s just right for your dish. A little bit of creativity can turn a simple gravy into a special sauce.
| Seasoning | Recommended Amount | Flavor Profile |
|---|---|---|
| Fresh Thyme | 1/2 tablespoon | Earthy, herbaceous |
| Garlic Powder | 1/4 teaspoon | Savory, pungent |
| Black Pepper | 1/2 teaspoon | Mild heat, sharp |
Pro tip: Always taste and adjust seasonings gradually to achieve the perfect balance of flavors.
Creating great white gravy is all about getting the flavors right. It’s about knowing how different seasonings work together. Your goal is to make a mix that makes the dish better, not worse.
Troubleshooting Common Gravy Problems
Making perfect gravy can be tough, but with the right tips, you can fix common issues. Whether you’re trying to thicken your gravy or facing other cooking challenges, this guide will help. You’ll learn how to make an easy gravy that will wow your guests.
Every home cook faces gravy problems. The trick is to know how to solve them quickly and with confidence. Let’s look at the most common gravy issues and how to fix them.
Fixing Lumpy Gravy
Lumpy gravy can spoil a great meal. Here are some ways to make your sauce smooth:
- Use a fine-mesh strainer to remove lumps
- Blend the gravy using an immersion blender
- Whisk vigorously while gradually adding room-temperature stock
“Smooth gravy is the mark of a confident cook.” – Culinary Wisdom
Adjusting Thickness
Getting the right gravy consistency is an art. Here are some tips for making your gravy thicker:
| Problem | Solution |
|---|---|
| Too Thin | Create a beurre manié with equal parts flour and butter |
| Too Thick | Gradually add warm stock or water |
Correcting Seasoning
An easy gravy needs perfect seasoning. If your gravy is too salty, try these quick fixes:
- Add a splash of acid like lemon juice or vinegar
- Incorporate more unseasoned stock
- Balance with a pinch of sugar
Pro tip: Always taste and adjust your gravy before serving. For more advanced techniques, check out Serious Eats’ gravy troubleshooting guide.
Storage and Reheating Methods

When planning for 15 people, knowing how to store gravy is key. Your homemade turkey gravy can stay fresh for days. This keeps the flavor delicious.
Refrigeration Guidelines
Put your gravy in an airtight container within two hours of making it. It can stay in the fridge for 3-4 days. Each serving is about 2 tablespoons, helping with portion control.
Freezing Techniques
Freezing is great for keeping gravy for a long time. You can freeze it for up to 4-6 months. Pro tip: Use freezer-safe containers with tight-fitting lids to prevent freezer burn.
Reheating Recommendations
- Thaw frozen gravy in the refrigerator for 1-2 days
- Reheat gently over low to medium heat
- Stir frequently to maintain consistency
- Avoid high temperatures to prevent separation
“Patience is key when reheating gravy – slow and steady preserves its delectable texture.”
If your gravy looks separated when reheating, add a bit of warm broth. This will make it smooth again.
Storage Nutrition Quick Reference
| Storage Method | Duration | Calories per Serving |
|---|---|---|
| Refrigerator | 3-4 days | 171 kcal |
| Freezer | 4-6 months | 171 kcal |
By using these tips, your turkey gravy will stay tasty and safe. This is true whether you’re hosting a big event or saving leftovers.
Make-Ahead Turkey Gravy Tips
Planning ahead for your turkey gravy can make your holiday cooking easier. A turkey gravy recipe without drippings lets you make a tasty sauce days early. This saves time and reduces stress on the big day.
Start by picking the right turkey parts for your gravy. Turkey wings and necks are great for a rich, flavorful base. Roast them at 400°F for about an hour to get deep, complex flavors.
“Preparing gravy in advance is a game-changer for holiday meal preparation.” – Professional Chef
Make-Ahead Gravy Preparation Steps
- Roast 3 lbs of turkey wings until golden brown
- Simmer with 8 cups of chicken stock for 1.5 hours
- Create a smooth roux using Wondra instant flour
- Cool and store in airtight containers
Storage and Freezing Guidelines
| Storage Method | Duration | Recommended Process |
|---|---|---|
| Refrigeration | 3-4 days | Store in sealed container |
| Freezing | Up to 3 months | Leave 1/2 inch space in container |
When you’re ready to serve, thaw your make-ahead gravy in the fridge. Pro tip: Reheat it gently, whisking to keep it smooth. You can also add fresh turkey drippings for extra flavor just before serving.
Your make-ahead turkey gravy recipe without drippings makes about 4-5 cups. This is plenty for a big holiday crowd, without the stress of last-minute cooking.
Conclusion
Learning to make turkey gravy can turn your holiday meal into something special. You’ll now be able to create a rich, flavorful gravy that makes your turkey dinner stand out. The techniques you’ve learned will help you mix all the flavors on your Thanksgiving plate perfectly.
Homemade gravy is more than just a side dish. It’s a way to connect with family traditions. With time, you’ll get better at making a smooth, tasty sauce that goes well with roasted turkey. Your guests will love the extra effort and flavor you put into your gravy.
Great gravy takes patience and practice. Each time you make it, you’ll get better and can try new things. Whether you’re having a classic turkey or trying new dishes, your homemade gravy will make the meal even better.
As you keep working on your gravy skills, you’ll see how it can change your holiday cooking. Just enjoy the process, trust yourself, and enjoy the yummy results of your cooking.