The Ultimate Brine for Turkey Recipe to Impress Your Guests
When the smell of roasted turkey fills your home, it brings back happy memories. It’s about family, friends, and laughter. What if I told you the right brine for turkey recipe could make these moments unforgettable? Brining is more than just seasoning; it’s a tradition that makes your turkey the star of the show.
It’s perfect for any big meal, like Thanksgiving or Christmas. Or even a cozy Sunday dinner. Learning how to wet brine will make your turkey juicy and full of flavor. Let’s explore how to make the ultimate turkey brine that will have everyone wanting more.
Key Takeaways
- Brining retains moisture, ensuring juicy turkey meat.
- 48 hours is the recommended time for flavor absorption.
- A typical brine recipe caters to 12-16 pound turkeys.
- Proper refrigeration during brining prevents foodborne illness.
- Leftover turkey can be stored for up to 4 days in the refrigerator.
- Using high-quality kosher salt impacts flavor and brine effectiveness.
Introduction to Brining Turkeys
Brining turkeys is a time-honored method that boosts flavor and keeps meat moist. You soak the turkey in a saltwater mix, sometimes with extra flavors. This practice is common in Southern cooking, where it’s a staple at family gatherings.
The main perk of brining is the benefits of brining: it makes the turkey taste better and stay juicy. By mixing salt and water with spices, you create a flavorful bath. This bath infuses the meat, making it taste richer and stay moist while cooking.
When brining turkey, follow some key rules. A wet brine should last 12 to 24 hours, with 24 hours being best for flavor. Use 1 tablespoon of salt for every cup of water. This ensures the turkey soaks up all the brine’s moisture and flavor.
Starting your brining journey will open up a world of flavors and techniques. Whether you stick to classic recipes or try new ones, you’ll improve your cooking skills. Check out brining turkeys for more ideas and inspiration.
Why Brine Your Turkey?
Brining your turkey can turn a dry meal into a juicy feast. This method adds flavor and keeps the turkey moist. The benefits of wet brining make the bird taste deeply seasoned, not just on the surface.
Benefits of Wet Brining
Brining is a favorite for many, making it a key part of Thanksgiving. It makes the turkey tender and helps it stay moist. Wet brining can reduce dryness by 10% to 15%.
The Science Behind Brining
The science of brining is about how salt works with the turkey’s proteins. Salt helps the turkey hold more moisture. This is thanks to osmosis and diffusion, making the turkey juicy.
Adding sugar and herbs to the brine can enhance flavors. Use about 0.5 to 1 teaspoon of kosher salt per pound of turkey. Cool the brine before using to keep it safe and prevent bacterial growth.
Improve your turkey cooking with these tips. For more ideas, check out ground chicken recipes for more poultry inspiration.
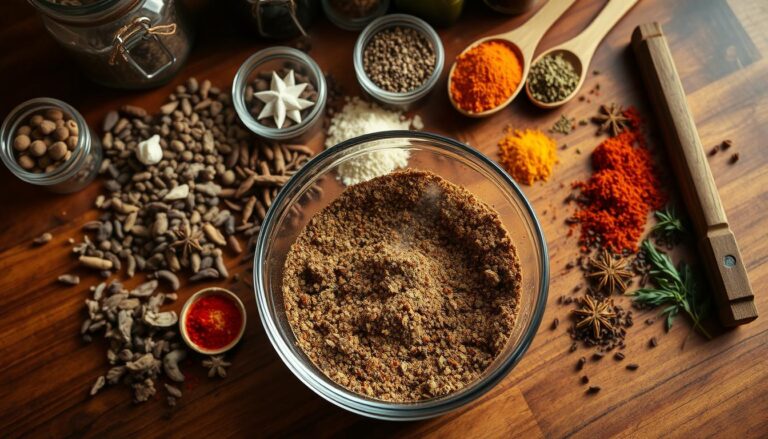
Choosing the Right Ingredients for Your Brine
Choosing the right ingredients for your turkey brine is key for flavor and moisture. It’s about balancing flavors and keeping the brining process right. A good brine mix recipe can make your turkey taste better and improve your meal.
Essential Ingredients for Brine
Every good brine starts with essential ingredients. They each play a special role:
- Kosher Salt: It’s better than table salt because it’s bigger and helps keep moisture in.
- Dark Brown Sugar: It adds sweetness and depth, making the brine taste better than white sugar.
- Water: It’s the base of your brine; use 2 gallons for a 14 to 18-pound turkey.
For a traditional wet brine, mix:
| Ingredient | Measurement |
|---|---|
| Water | 16 cups |
| Kosher Salt | ½ cup |
| Dark Brown Sugar | ½ cup |
| Dried Red Pepper Flakes | 1 tablespoon |
| Dried Sage | 1 tablespoon |
| Fresh Thyme | 1 bunch |
| Garlic | 2 heads, sliced in half |
Optional Flavor Enhancements
There are many ways to make your turkey brine even better. Try adding:
- Citrus Fruits: Lemon or orange can add a fresh taste.
- Fresh Herbs: Rosemary and thyme can add depth and aroma.
- Garlic: More garlic or garlic powder can add flavor.
- Spices: Try crushed peppercorns or star anise for something different.
Choosing herbs and spices should match your taste and any local flavors you want to highlight. Making your brine your own lets you be creative in the kitchen. Your turkey will look great and taste amazing.
The Ultimate Brine for Turkey Recipe
Make your turkey a true masterpiece with our ultimate brine recipe. It ensures juicy flavor in every bite. You’ll learn about the ingredients and how to make the best brine.
Ingredients Overview
Here’s what you need for your turkey brine:
- 2 gallons of water
- 1½ cups of kosher salt
- ⅓ cup of brown sugar
- ¼ cup of Worcestershire sauce
- 8 cloves of minced garlic
- Your choice of spices and herbs (e.g., thyme, rosemary, peppercorns)
This mix works for turkeys up to 16 pounds. For bigger birds, just add more of each ingredient.
Step-by-Step Instructions
Here’s how to make your brine:
- Mix 2 gallons of water, 1½ cups of kosher salt, and ⅓ cup of brown sugar in a big container. Stir until everything dissolves.
- Add Worcestershire sauce, minced garlic, and your spices. Mix well.
- Put the turkey in the brine. If it’s not fully covered, add more water and salt to cover it.
- Keep the turkey in the fridge for at least 4 hours. But 12 to 24 hours is even better for flavor.
- Rinse the turkey with cold water to remove excess salt. Then, dry it with paper towels before cooking.
Make sure your brining container is safe for food and big enough. Keep the turkey cool during brining. Use ice packs if needed. For more tips, check out our ultimate guide.
How to Brine a Turkey Properly
Brining a turkey makes it taste better and stay juicy. But, you need to do it right. Knowing the best ways to brine a turkey helps soak the meat fully. This keeps it moist while it cooks.
Brining Techniques
First, make sure the turkey is fully covered in the brine. If it floats, use a plate or weight to keep it under. Turn the turkey halfway through the soaking time, which is 12 to 24 hours.
A 12-hour brine keeps the turkey juicy, even if it’s a bit overcooked. But, brining for more than 24 hours can make the meat spongy.
Choosing the Right Container
Choosing the right container is key for brining. Pick one big enough to hold the turkey. You can use stainless steel pots, food-safe plastic buckets, or brining bags.
Stay away from containers that can react with the turkey’s meat. This could change the taste or be unsafe. A 5-gallon container works well for most turkey sizes.
How Long Should You Brine a Turkey?
Brining a turkey is key to a delicious meal. Knowing how long to brine is crucial for tender and flavorful meat. The brining time depends on the turkey’s size and your taste.
Recommended Time Frames
Here are some general brining times:
| Turkey Weight | Recommended Brining Duration |
|---|---|
| Under 12 pounds | 8 to 12 hours |
| 12 to 15 pounds | 24 to 36 hours |
| 15 to 20 pounds | 24 to 48 hours |
| Over 20 pounds | Up to 3 days |
Watch the brining time to avoid too salty meat. For most birds, 24 hours is a good time. This is best if you plan to roast it soon.
Factors Affecting Brining Duration
Several things can change how long you brine a turkey:
- Size of the Turkey: Bigger turkeys need more time to soak up flavors and moisture.
- Fresh vs. Frozen: Fresh turkeys brine faster than frozen ones. Make sure frozen turkeys are thawed before brining.
- Personal Preference: Everyone likes different flavors. If you like it saltier, brine it longer. But be careful not to overdo it.
Remember these points to adjust brining to your liking and turkey size.

Additional Turkey Brining Tips
Brining can make your turkey taste amazing. But, knowing some key tips can help even more. To keep your turkey moist and tasty, follow the best brining practices. Make sure to mix your brine solution well.
Use a 1 cup of kosher salt for every 1 gallon of water. For a 10-pound turkey, use 1 cup of kosher salt and 2 gallons of cold water. This is a good starting point.
Best Practices for Tender Turkey
Keep an eye on the temperature while brining. Place your turkey on the lowest shelf of the fridge. This helps keep it at a safe 40°F (4°C) or lower.
Adding herbs and spices like lemons, fresh herbs, and garlic can give your turkey a unique taste. Also, dry the turkey well after brining to get crispy skin. Brining for 12 to 24 hours is usually best. Adding sugar can also enhance the flavor, as one person discovered last year.
Common Mistakes to Avoid
Don’t use table salt; it’s too fine and can make the turkey too salty. Also, always rinse the turkey after brining to avoid too much salt. Don’t brine for more than 24 hours to avoid over-salting.
Always follow proper food safety and sanitation to avoid contamination. This way, you can enjoy a delicious brined turkey.
For more detailed guidance, check out this recipe here.
How to Prepare Your Turkey After Brining
After brining, it’s key to take the right steps to ensure your turkey is perfect. First, remove excess moisture from the turkey’s surface. This is important because moisture can prevent the skin from getting crispy during cooking.
Drying the Turkey
To dry the turkey, remove it from the brine and pat it dry with paper towels. For the best results, let the turkey rest in the fridge, uncovered, for 24 hours. This helps the skin dry out, leading to a crispy finish when cooked.
Cooking Techniques for Brined Turkey
There are several ways to cook a brined turkey, like roasting or smoking. If roasting, preheat your oven to 325°F. The USDA says to cook it to 165°F to 168°F for safety. A 20-pound turkey takes about 3 ½ hours to cook first, then another 1 ½ to 2 hours to roast. Baste every 30 minutes to keep it moist and flavorful.
Smoking can add a unique flavor. Make sure your smoker is at 225°F to 250°F. Use wood chips like hickory or apple for great taste. Always check the turkey’s internal temperature with a meat thermometer to ensure it’s done.
Adding extra seasonings after brining can also enhance flavors. Simple spices, herbs, or a glaze can add a delicious layer. With the right techniques, your turkey will be moist and full of flavor.

| Preparation Time | Cooking Time | Total Time | Yields |
|---|---|---|---|
| 10 minutes | 5 hours | 5 hours and 10 minutes | 16 servings |
Follow these steps to prepare your turkey after brining, and you’ll impress your guests. For more on smoking techniques, check out this guide.
Serving Suggestions for Your Brined Turkey
Perfecting the brining process is just the start. Now, focus on how you present and pair your turkey. Choose side dishes that bring out the turkey’s flavors and add a pop of color to the plate.
Pairing with Side Dishes
Here are some side dishes that will make your turkey shine:
- Mashed Potatoes: They’re creamy and buttery, balancing the turkey’s savory taste.
- Herb Stuffing: Fresh herbs add depth and texture, a classic choice.
- Roasted Seasonal Vegetables: A mix of colorful veggies like carrots and squash adds nutrition and beauty.
- Cranberry Sauce: Its tartness cuts through the richness of the turkey, enhancing flavors.
- Green Bean Almondine: This side offers a crunchy contrast to the soft turkey.
Presentation Tips
Make your turkey look as good as it tastes. Here’s how:
- Garnish: Fresh herbs or orange slices can add a pop of color.
- Use a Platter: A large platter with colorful sides makes for a stunning display.
- Carve Strategically: Carve in the kitchen for a neat presentation.
- Add Color: Seasonal fruits like pomegranates add vibrant colors.
- Serve with Style: Choose rustic dishes to show off your homemade meal.
With the right side dishes and presentation, your turkey will be a hit. Focus on color, texture, and flavor to impress your guests. Your brined turkey will be the star of the show.
Storing Leftover Brined Turkey
Storing leftover brined turkey right lets you enjoy its flavors for longer. By using the right methods, you can keep your leftovers fresh and tasty.
Refrigeration and Freezing Tips
For leftover turkey refrigeration, use airtight containers. This keeps it fresh for up to four days. Divide the turkey into smaller parts within two hours of cooking. This helps it cool evenly and keeps it from losing quality.
For freezing brined turkey, you can safely store it for up to a year. But for the best taste, eat it within six months. Wrap it tightly in foil, then put it in freezer-safe bags or containers.
Reheating Instructions for Optimal Flavor
To reheat your turkey without drying it, use covered dishes with a bit of broth. This keeps it moist and brings out the flavor. Slice the turkey before reheating to warm it evenly.
| Storage Method | Duration | Signs of Spoilage |
|---|---|---|
| Refrigeration | Up to 4 days | Slimy texture, foul smell |
| Freezing | Up to 1 year (optimal quality within 6 months) | Discoloration, toughness, dryness |

Conclusion
Now you know how amazing the ultimate brine for turkey is. It makes your turkey taste better and stay moist. Your guests will love it. Remember, brine your turkey for 12 to 24 hours, depending on its size.
When you’re ready for your next big event, think about wet and dry brining. Make sure you have a big pot or brining bag. This will help your turkey soak up all the flavors. It makes the meat tender and delicious.
Lastly, making this ultimate brine for turkey is a great choice for your holiday meals. Follow the right steps and you’ll wow your family and friends. They’ll talk about the amazing flavors for a long time. So, get ready to improve your cooking skills and make unforgettable meals.